If you’re new to Nostr, you might have heard about ‘Pay-To-Relay’ or ‘Private-Relay’ in passing or had someone recommend looking into them. The first question that probably crossed your mind is, ‘What are they, and why should you get them?’ Well, rest assured, you wouldn’t be the first to wonder.
Relays are the servers that enable Nostr to function. All data in the Nostr network is ‘relayed’ through these servers, contributing to Nostr’s decentralized nature, accessible for anyone to run. You can have your private Nostr relay exclusively for yourself and those you choose to share it with. Should you desire, you could link your private relay to a public domain, making it a “Public Relay” available for everyone to access. Alternatively, you can establish a private relay, offering it exclusively to those willing to pay a small fee for its use. Why, you ask? Simply because spammers are less inclined to pay for their spamming endeavors.
Check out our post titled “What is Nostr” and “What Are Nostr Relays” for more information on the topic.
Private Pay-to-Relay (Paid Relays)
Private ‘Pay-to-Relays’ contribute to a cleaner and more curated social experience. The landscape boasts an ever-expanding array of these relays, with many fostering communities centered around specific topics or interests. Picture them as small floating bubbles, each harboring like-minded individuals converging around shared interests and intrigues.
Consider our relay, the YEGHRO relay, as an example. It primarily consists of ‘Nodestrichs’—a community of experienced lightning node runners dedicated to assisting newcomers in navigating the challenges of operating their own lightning node and understanding Bitcoin’s technology. Our relay also welcomes tech enthusiasts, along with a delightful mix of art and meme enthusiasts.
Nodestrich has a telegram group you can join if you too are beginning your journey into understanding and running a Bitcoin lightening node.
Click here to explore the Nodestrich telegram group.
Adding/Removing Relays
Now that you have a basic understanding of what relays do and how they are useful let’s discuss how to add and remove relay to curate your Nostr feed.
Any Nostr client you use will have a “Relays” sections or tab inside their settings. If your not totally sure what “clients” are, they are the app or websites that provide the social experience similar to twitter or facebook. For example the iOS app “Damus” is a Nostr client, so is “Primal“. If you’ve used Snort.social or Coracle.social they are also clients, web based clients you can use from any Browser.
In all of these clients you can find within their settings a relay section that will allow you to add your preferred relays to use for that client.
For example, here is where you can find your settings and relay list in Damus:
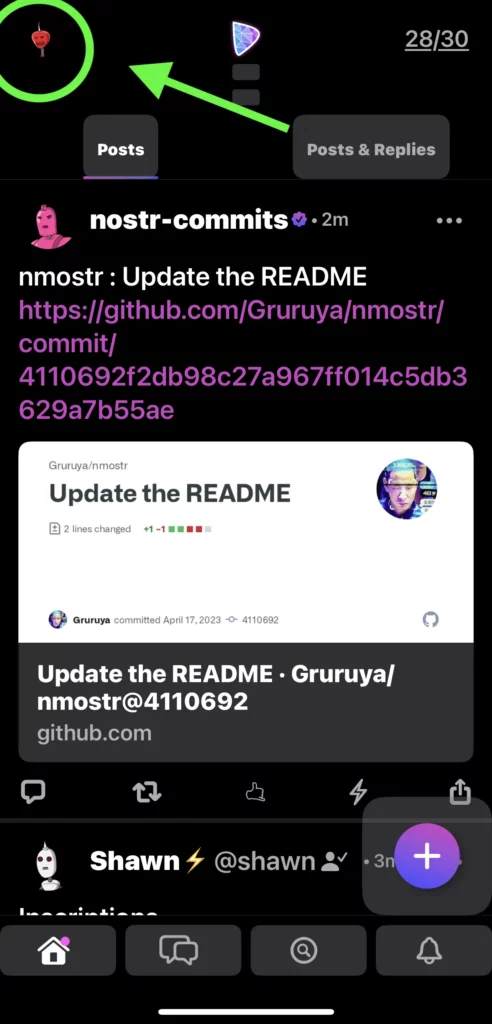
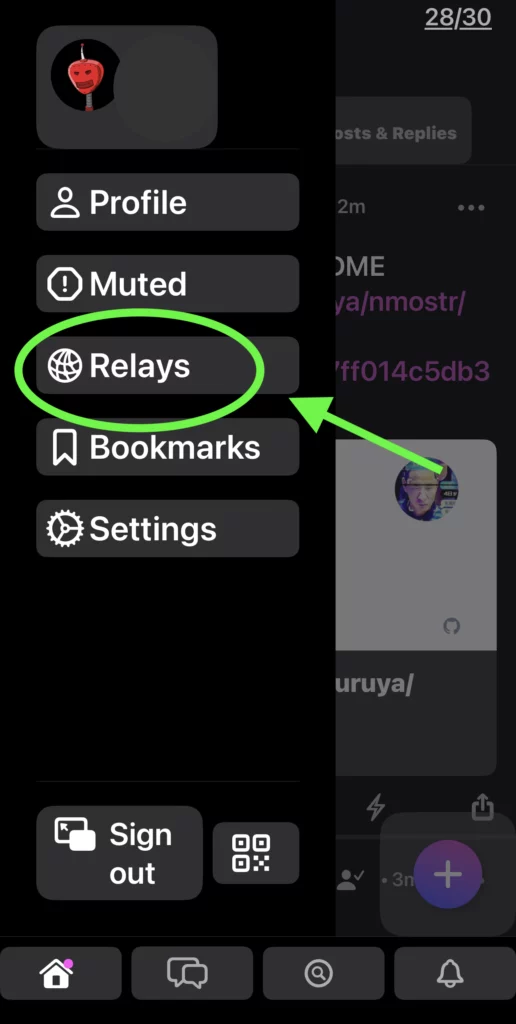
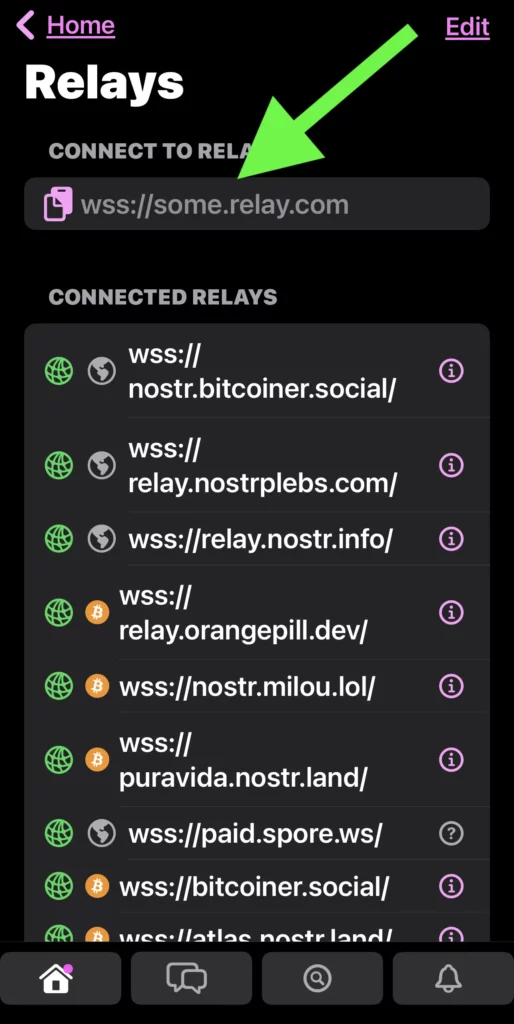
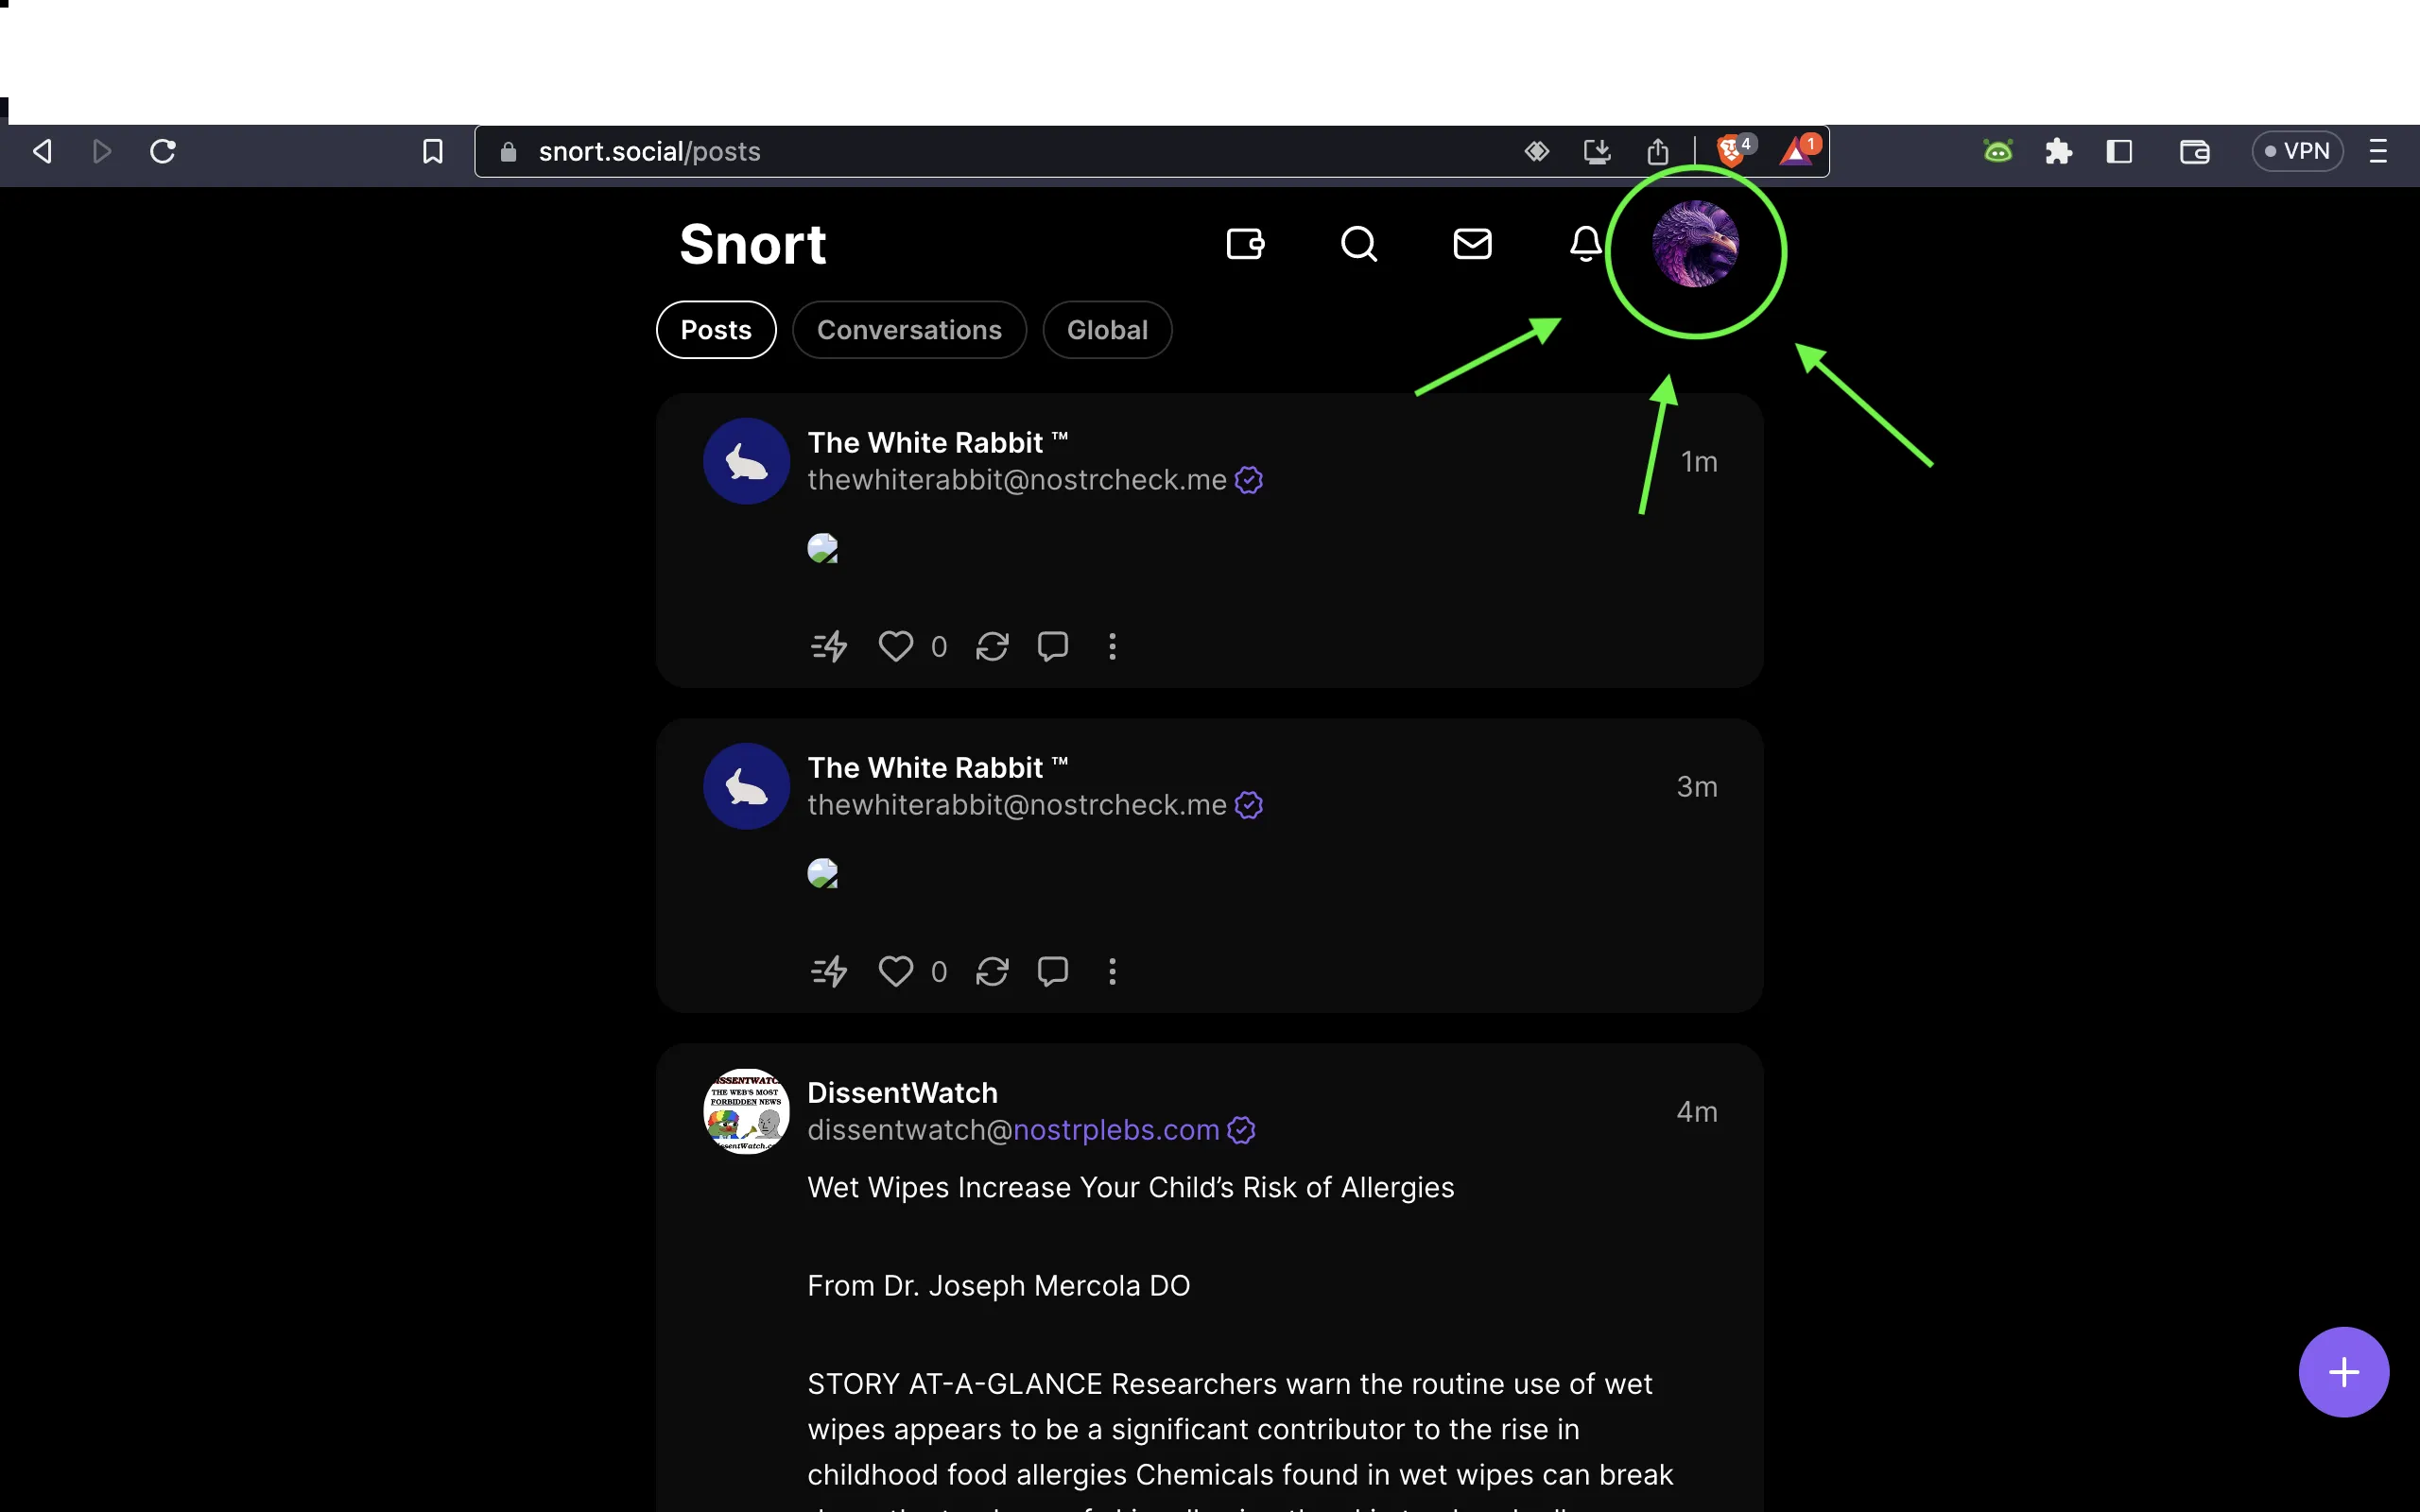
Here is how to find Snort settings and relay list:
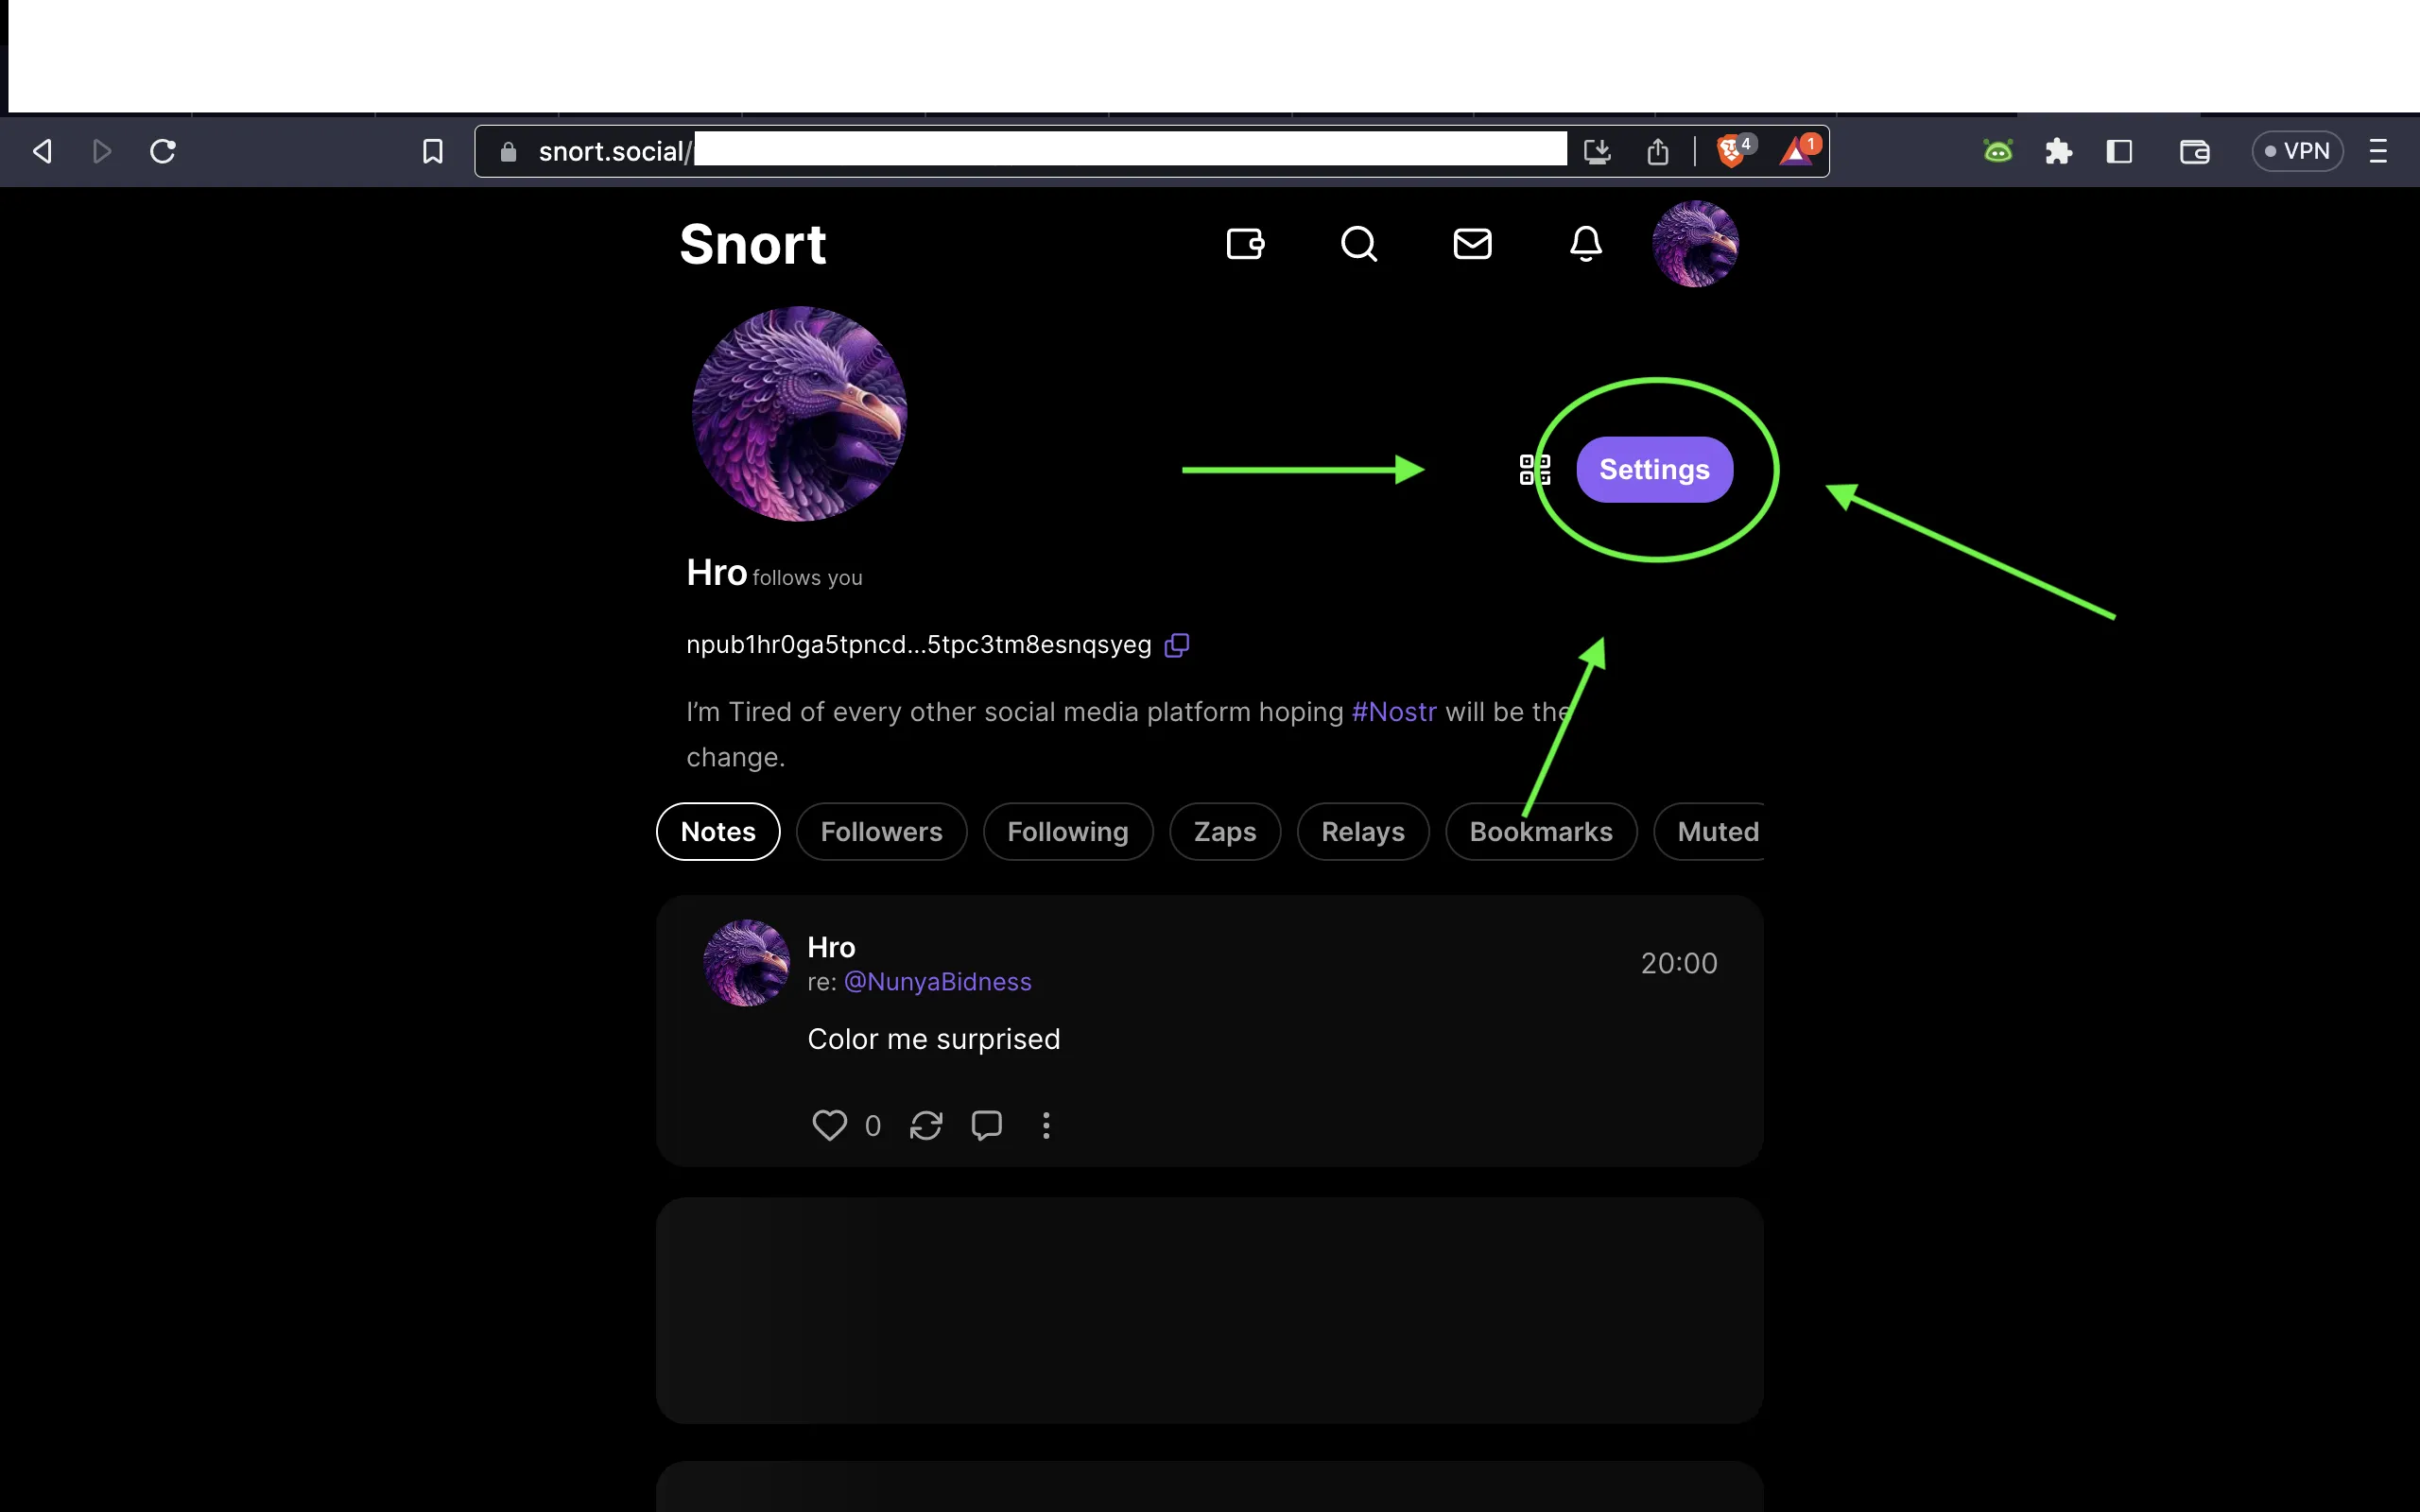
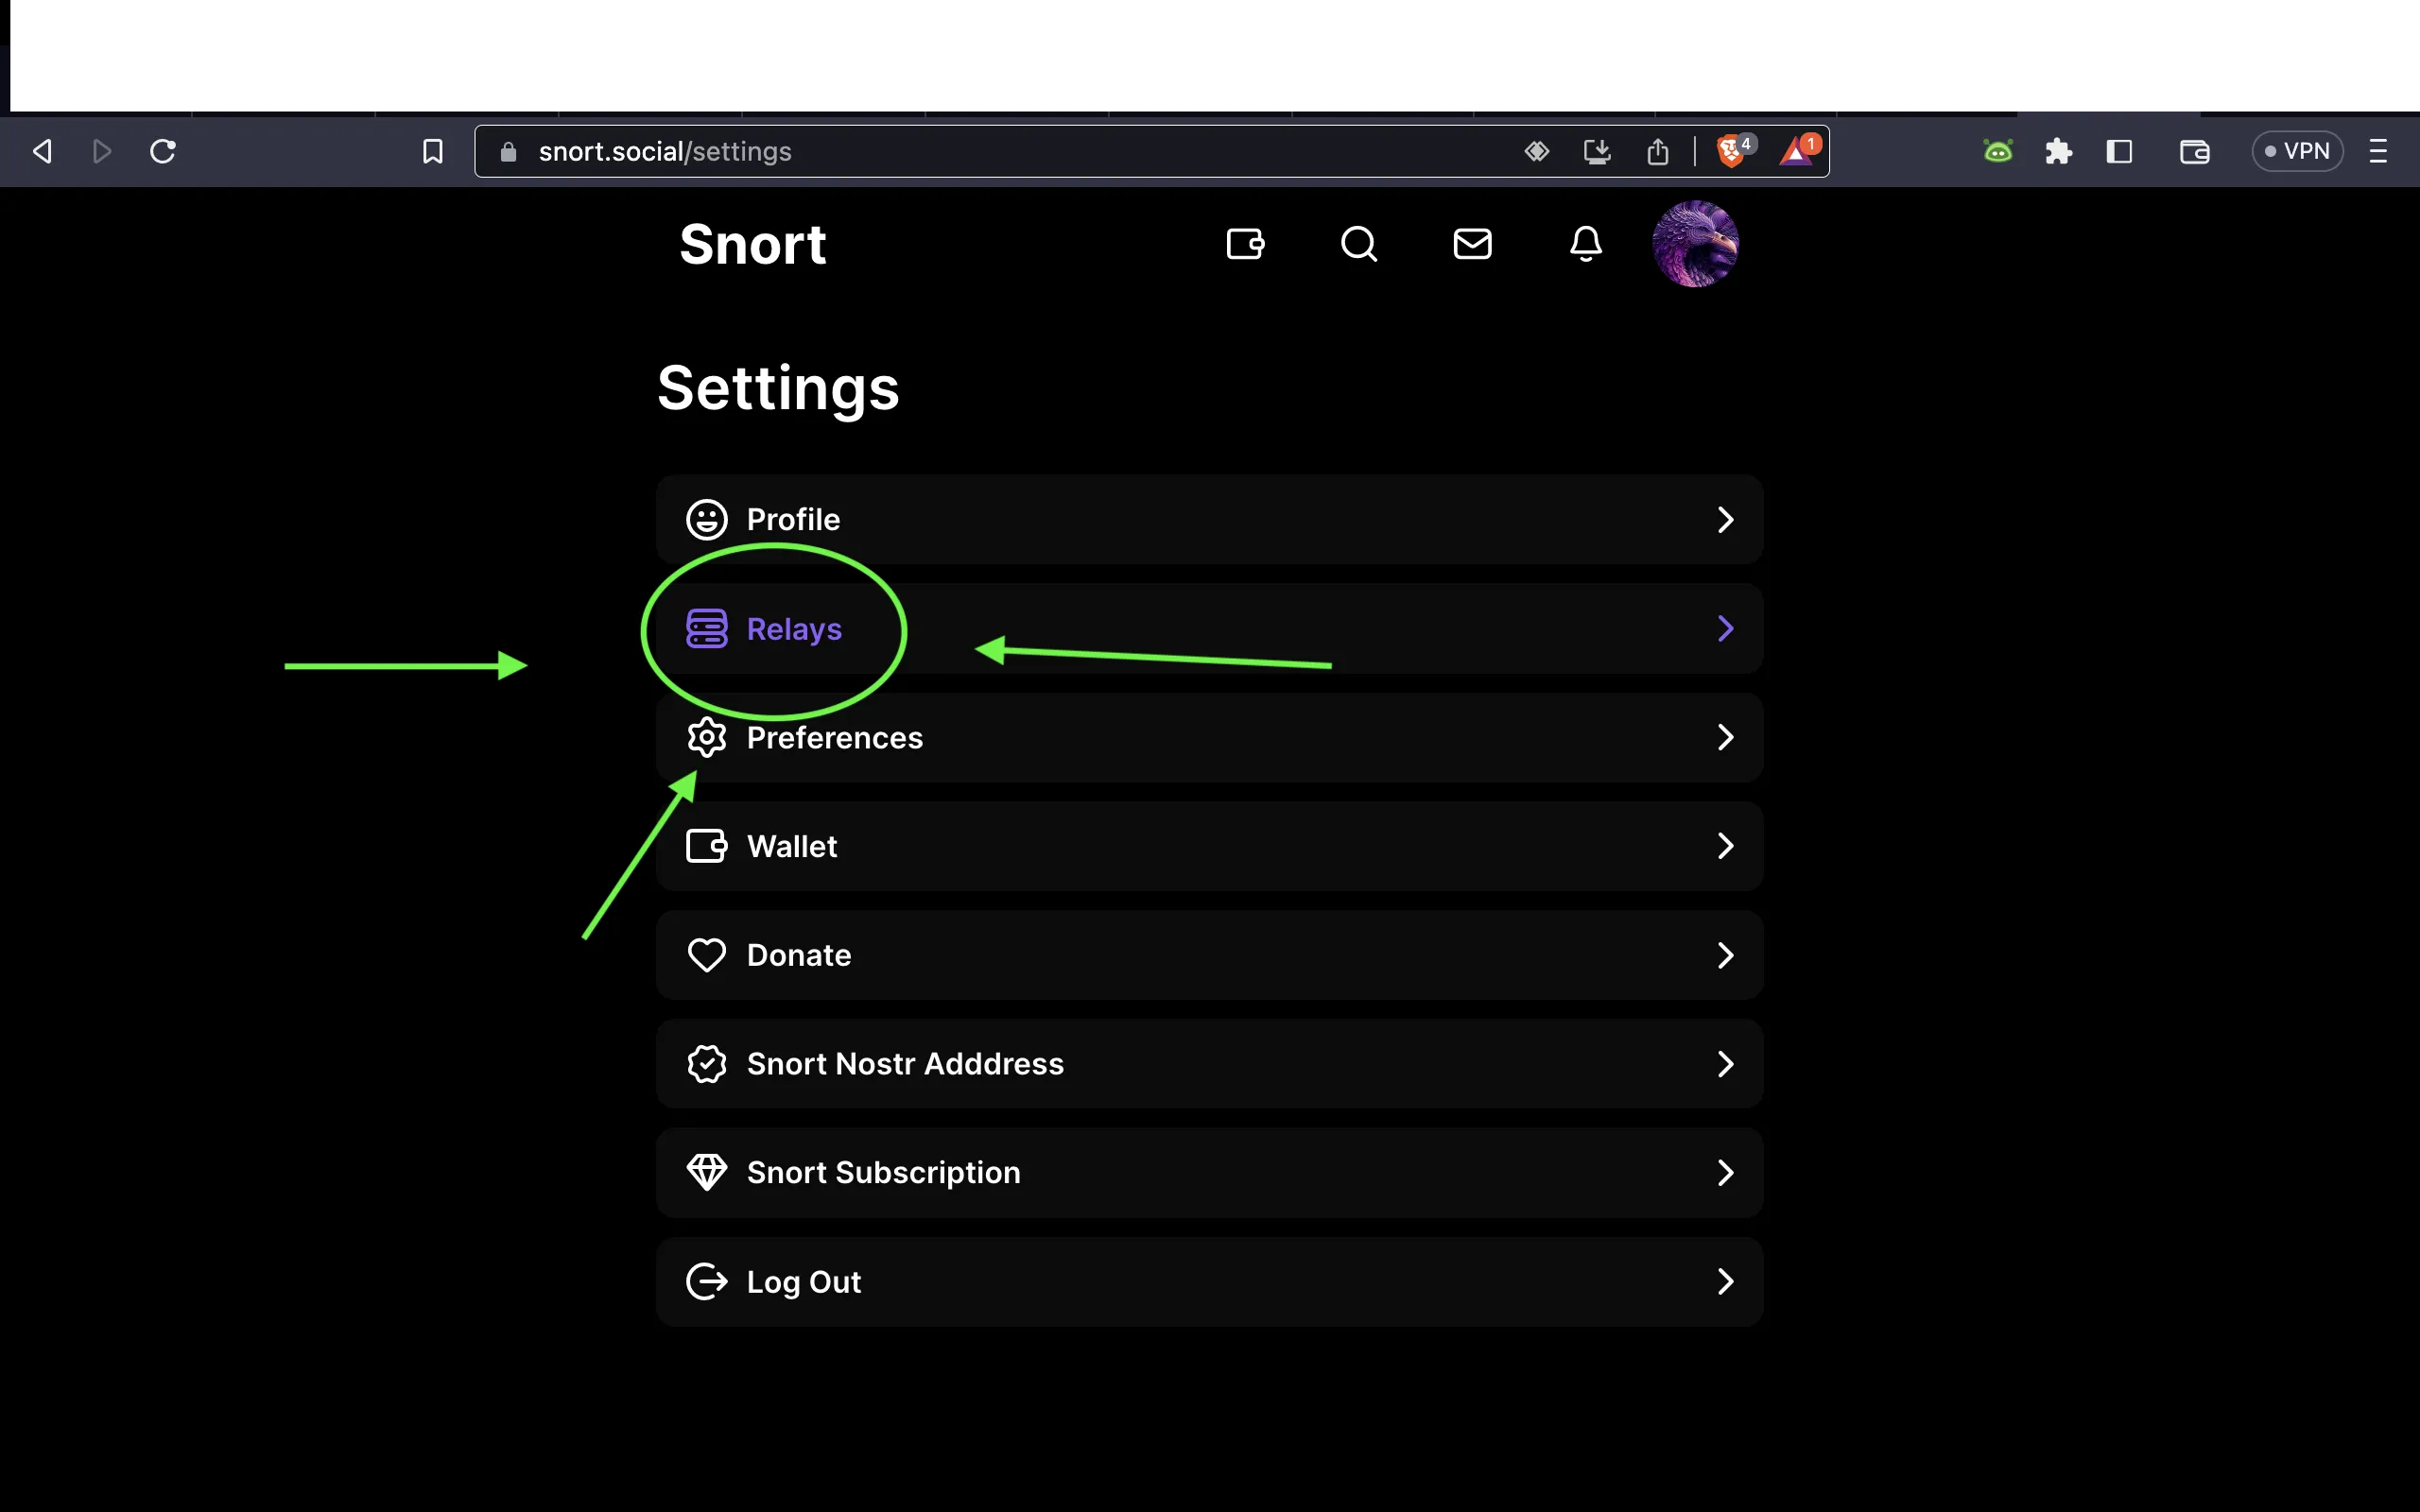

Now that we’ve located where to manage relays for our Nostr social media clients, we can curate the content displayed in our feed by adding or removing relays. These act as our filtered lenses, offering a selective view of the ‘Nostrverse,’ so to speak.
Finding Relays
There are many ways to find relays to join. Easiest of which is to simply #AskNostr. Post a note on Nostr asking which relays may be worth checking out. Alternatively, Nostr.Watch is a fantastic resource for finding relays. It’s a website that has a list of almost all the relays out there that want to be known and lists them by ‘public’ and ‘paid’ for your convenience.
After you’ve identified a relay you’d like to join, visit their URL (web address), and, if applicable, agree to any terms. Enter your Nostr account npub, the public key available in your profile page on the client you’re using. Below is YEGHRO relays sign up page as an example.
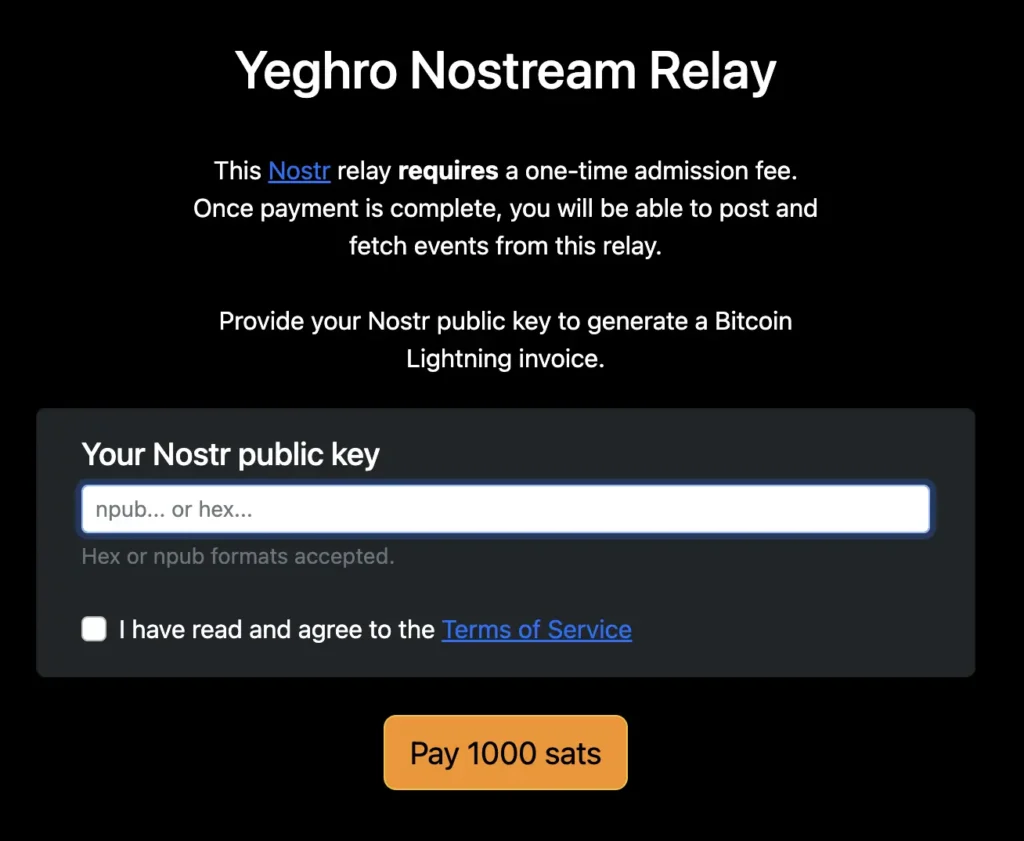
If you’ve installed a Nostr extension, such as ‘GetAlby,’ on your browser, it can be utilized to input your npub. It will also automatically prompt you to confirm any payment needed to join when you visit a relay web site.
Finally, it’s crucial to remember that when adding your new Nostr relay address to your relay list. You should start the address with ‘wss://’ instead of the more familiar ‘http://’. The address remains the same as the one you visited for signup, but in your relay list it should begin with ‘wss://’. Simple enough, isn’t it?
For example, YEGHRO relay address https://nostrelay.yeghro.site for sign up. Although when entering the relay to your relay list in your Nostr client it must look like this “wss://nostrelay.yeghro.site”.
Get to stacking to relays, nostrich plebs.
If you found this helpful feel free to leave a tip below or better yet come join YEGHRO pay-to-relay.