
I find myself mentioning LNBits in much of my writing lately, often assuming that the reader knows what I’m talking about. So, I’ve come to the conclusion that it might be a good idea to explain what it is and how to set up LNBits for yourself.
What is LNBits?
This is the easy part. LNBits is a wallet/account system that operates on top of your Bitcoin node. It’s powered by the Lightning Network, meaning you should also have a Lightning node running along side your Bitcoin node to use LNBits. Assuming you have both a Bitcoin and Lightning node up, with open lightning channels to allow for lightning transactions, setting up LNBits is not difficult. It’s the configuration after the setup that can be a bit confusing for some, including myself.
If you don’t have a Bitcoin and/or Lightning node, I suggest you join groups like “Nodestrich” on Telegram. This community is very helpful and will provide all the guidance you need to get one running and open channels. It may sound complicated, but it’s easier than you might imagine. Umbrel and Start9 are two easy-to-set-up options among many that can streamline the whole process.
How To Setup
The easiest way to set up LNBits is through Umbrel or Start9 implementation, where you get an all-in-one package system that includes an app store to handle all the back-end tasks for you. On Umbrel or Start9, you can simply visit their app store, search for and download the app, and it will install it for you. With this approach, you’re only left with having to fine-tune LNBits with your desired plugins to achieve the system you require. More on that later.
For the purposes of this guide, I will describe the process of installing LNBits in a Docker container running on a Linux machine. If you’re using a Windows machine, most of this information should still be applicable, as Docker works similarly in both environments.
Install Docker
So assuming you’re on an Ubuntu Linux machine, you’ll first need to install Docker if you don’t have it already. Simply run the following command in your terminal app to install:
sudo apt-get install docker-ce docker-ce-cli containerd.io docker-buildx-plugin docker-compose-pluginIf you run into any errors, you may need to follow the full install instructions found on Docker’s official site. Once installed, we’ll need to download a copy of LNBits. First, make a new directory to perform all these actions in:
mkdir lnbits && cd lnbitsInstall LNBits
Now copy and paste the following to install the LNBits docker container and get it up and running:
docker pull lnbitsdocker/lnbits-legend
wget https://raw.githubusercontent.com/lnbits/lnbits/main/.env.example -O .env
mkdir data
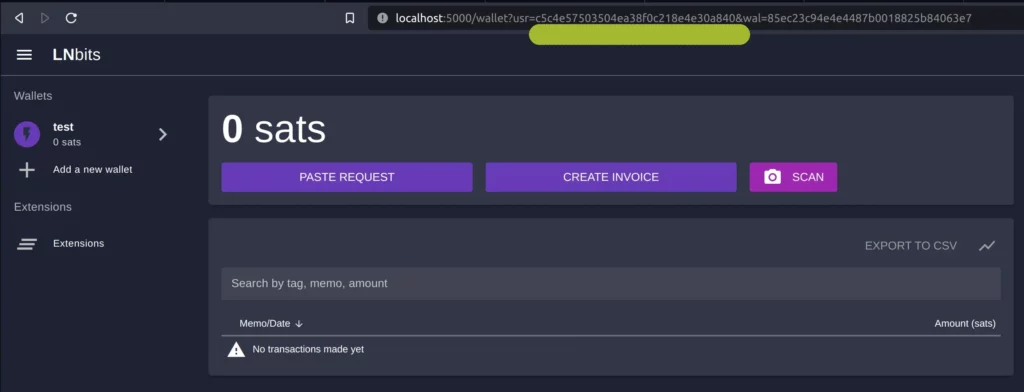
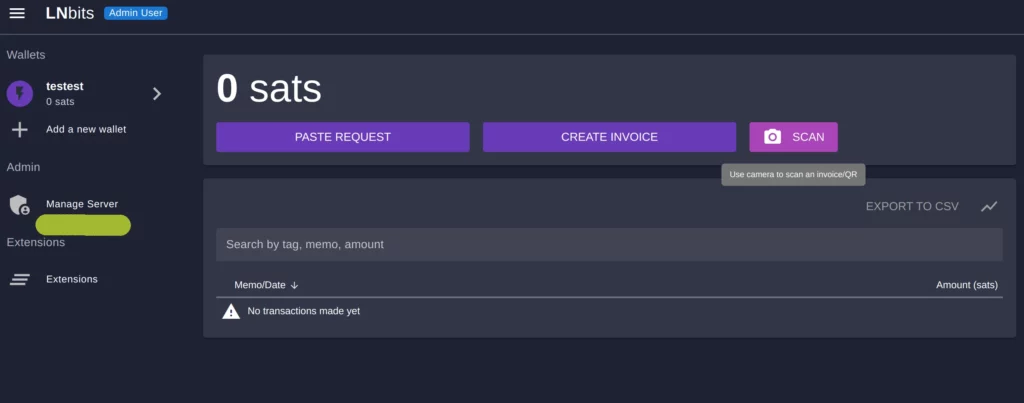
docker run --detach --publish 5000:5000 --name lnbits --volume ${PWD}/.env:/app/.env --volume ${PWD}/data/:/app/data lnbitsdocker/lnbits-legendIf all goes well you should have a locally running instance of LNBits on your Linux machine. You can test it out by visiting http://localhost:5000 in your browser. Create a new wallet by entering a name for it and clicking the “ADD A NEW WALLET” button. Copy the wallets user id found in the browser address bar. See image below:
Before we continue we should prepare the .env file by typing in the following from within the lnbits folder you should still be in. Paste the following into your terminal:
cp .env.example .envYou will now have a .env file which you wont see unless you use the command “ls -a”.
Now comes the configuration part. We need a funding source for our LNBits so we can use all of its great tools. In the same LNBits folder you should still be in, you will have a file named “.env.”
Configure LNBits
Enter the following into your terminal:
nano .envYou may need to sudo in to be able to save changes.
sudo nano .envThis will open the file in a text editor, allowing you to change its contents. I recommend looking through this document carefully, as it holds many very useful options that can be enabled. Options like “Admin UI” will give you more control over how your LNBits instance will function, including the ability to choose what apps will be allowed, and who can and cannot use what, and so forth.
If you want to allow access to LNBits from other devices on your local network, I’d recommend changing the HOST to 0.0.0.0; otherwise, setting it to 127.0.0.1 will only allow local access from your current host machine.

Funding Source
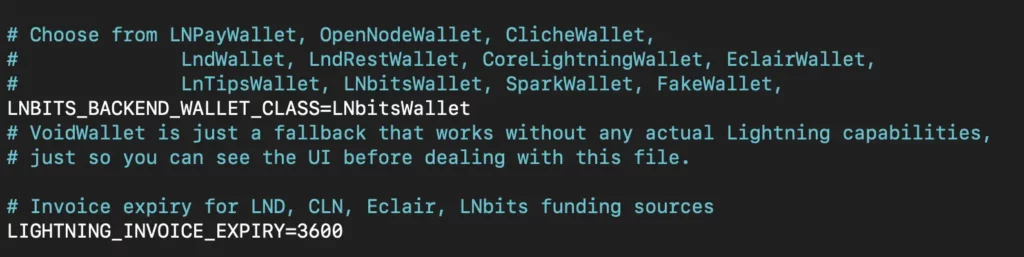
Among these settings—if you scroll down a bit—you’ll find the line “LNBITS_BACKEND_WALLET_CLASS=.” See the image below.
Choose your funding source, scroll down and input the necessary data to allow your LNBits instance to connect.
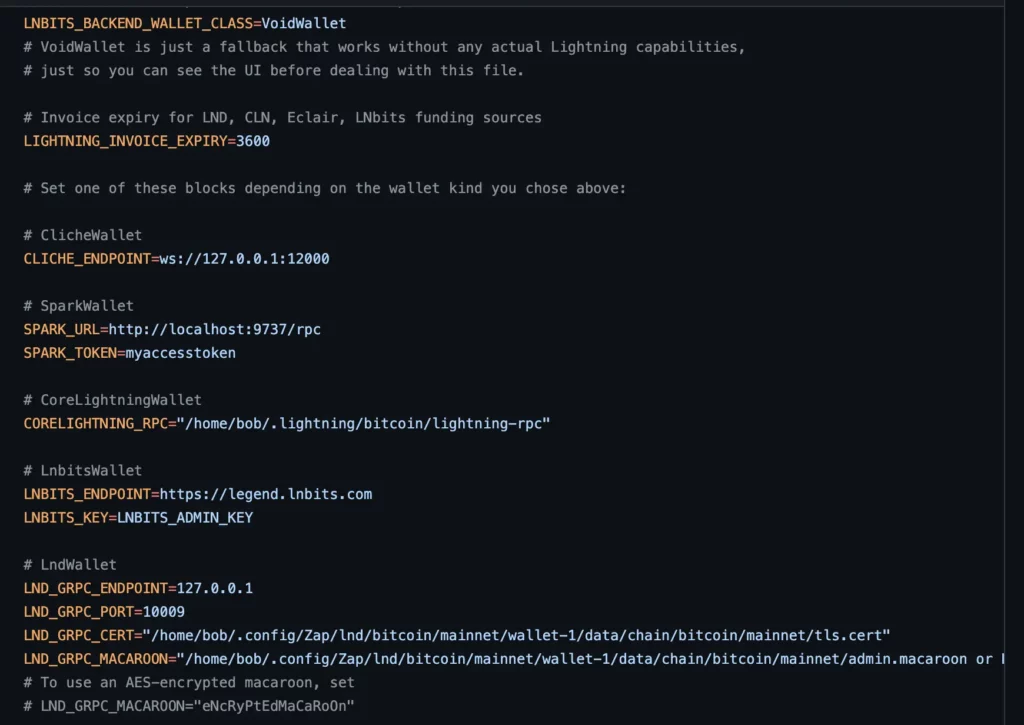
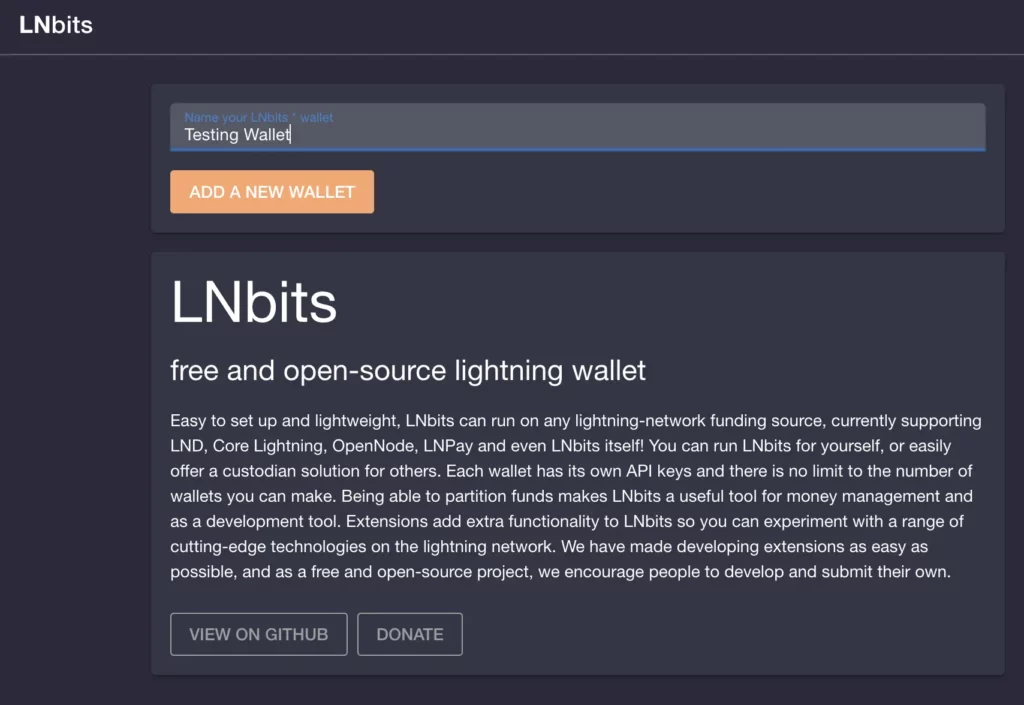
You can connect your LNBits to multiple different funding sources, even other LNBits instances. For the purpose of this guide, I’ll be connecting this LNBits instance to LNBits.com directly, as they provide a public implementation of their software for testing and trying out. To do so, all you need to do is go to legend.LNBits.com, give your wallet a name, click the “ADD A NEW WALLET” button, copy the wallet’s admin key and paste it over to your .env file.
To use one of the other options, refer to this guide from LNBits, which provides examples of how to configure the other available funding source options. There is a helpful Youtube video worth watching for the more visually acclined.
Admin UI
Earlier, I mentioned the “Admin UI” option in the “.env” file. I would recommend turning that setting on and using it to install the plugins you’re interested in using and allowing others to use (if you’re planning on others using it). It should look something like this:

Find and add this user id we copied from your web browser earlier to the admin list inside the .env file. It should look something like this when done:
LNBITS_ADMIN_USERS="c5c4e57503504ea38f0c218e4e30a840"Now in your terminal restart your docker container with:
docker restart lnbitsYou can once again open your browser and type in the address localhost:5000. You should see the landing page of your LNBits instance. If all your settings have been input correctly, you should be able to create a wallet to which you may receive funds.
But what about the Admin UI stuff? To get access to the Admin UI, you need to open your web browser and type in the address to your LNBits instance with the user ID we configured to be the Admin. It should look something like this:
http://localhost:5000/wallet?usr=c5c4e57503504ea38f0c218e4e30a840. The segment /wallet?usr=c5c4e57503504ea38f0c218e4e30a840 is the important part. This should open the Admin user wallet with the “manage server” option available on the left side of your screen.
From here, you can click on the “manage server” button and start fine-tuning your LNBits. Install the apps you’d like to use, allow others to use them, and even limit which users are allowed to use LNBits.
Hopefully this guide is help without being too overwhelming. If you have any questions or comments find us Nostr, [email protected] or just search YEGHRO and you should find the account.
If you found this post helpful feel free to leave us a tip below.
Leave a Reply